
DIY Spring Container Garden

Embrace the arrival of spring by diving into the world of gardening with your very own DIY spring container garden. From selecting the perfect plants to arranging them in a beautiful display, I’ll walk you through a step-by-step tutorial on how to bring a touch of nature’s beauty into to your home or patio.
As spring is quickly approaching I can’t help but want to plant all the seeds and bulbs for this year. However, since we’ll be moving I know my time will be better spent planting a fall garden at our new house and skipping the spring season here.
But if you know me, I love gardening and I was struggling with the idea I couldn’t plan a full outdoor garden this year.
It’s been so cold here I knew it wasn’t even time to plan my outdoor flowers anyways.
I began pondering what spring flowers could I potentially do small batches of and I remembered while living in Texas I had been able to have hyacinths in my kitchen window during early spring.
As I started researching hyacinths in my local area, I came across numerous images of them paired up with tulips. This sparked the idea of creating an indoor container garden, which seemed like the ideal way to introduce those vibrant & lively florals into my home while still indulging in the joys of spring gardening.
Container Gardens
A container garden is a type of garden where plants are grown in containers such as pots, planters, boxes, or even baskets, rather than directly in the ground. Container gardens are popular for several reasons:
- Flexibility: You can place container gardens on patios, balconies, decks, or even indoors, making them suitable for urban environments or spaces with limited outdoor areas.
- Design: You can create visually appealing arrangements by mixing different plants, colors, and textures within a single container or by grouping multiple containers together.
Container gardens can include a wide variety of plants, including flowers, herbs, vegetables, shrubs, and even small trees, depending on the size of the container and the growing conditions available. They offer a versatile and convenient way to enjoy gardening regardless of your living situation or gardening experience.
I’ve made a lot of outdoor container gardens over the last few years, some of my favorites have been my herb gardens and wildflower/butterfly gardens but I’ve never made an indoor spring floral garden until now.
Spring Container Garden
Materials
- Shallow Planter
- Spring Florals
- Soil
- Potting Mat (optional)
Shallow Planter

For this project you’ll want a shallow planter. I’ve linked a variety for you in my LTK store below. You’ll want to think about drainage. Mine already had a drainage hole in it but I also added a liner. This isn’t necessary but I wanted to ensure good drainage so I added multiple holes to my plastic liner, which would ensure my drainage hole would not get clogged with soil.
Spring Florals

Before you start gathering supplies you’ll want to visual and plan your container garden. What plants will you want in your container garden?
Here are a few ideas of spring florals that you could consider:
- Tulips
- Hyacinths
- Crocus
- Daffodils
- Iris Reticulata
- Snowdrop
- Primrose
When you’re picking your florals I suggest buying larger planters of bulbs, ones that have 3-5 bulbs per planter. These larger packs tend to be more cost effective than buys singular bulbs. Our local nursery had 4 tulip bulbs for $9 or I could purchase one for $5.
Below you’ll find a link where you can purchase live bulbs on Amazon but again, they’ll probably be cheaper at your local stores. I even saw some at Target for $7.
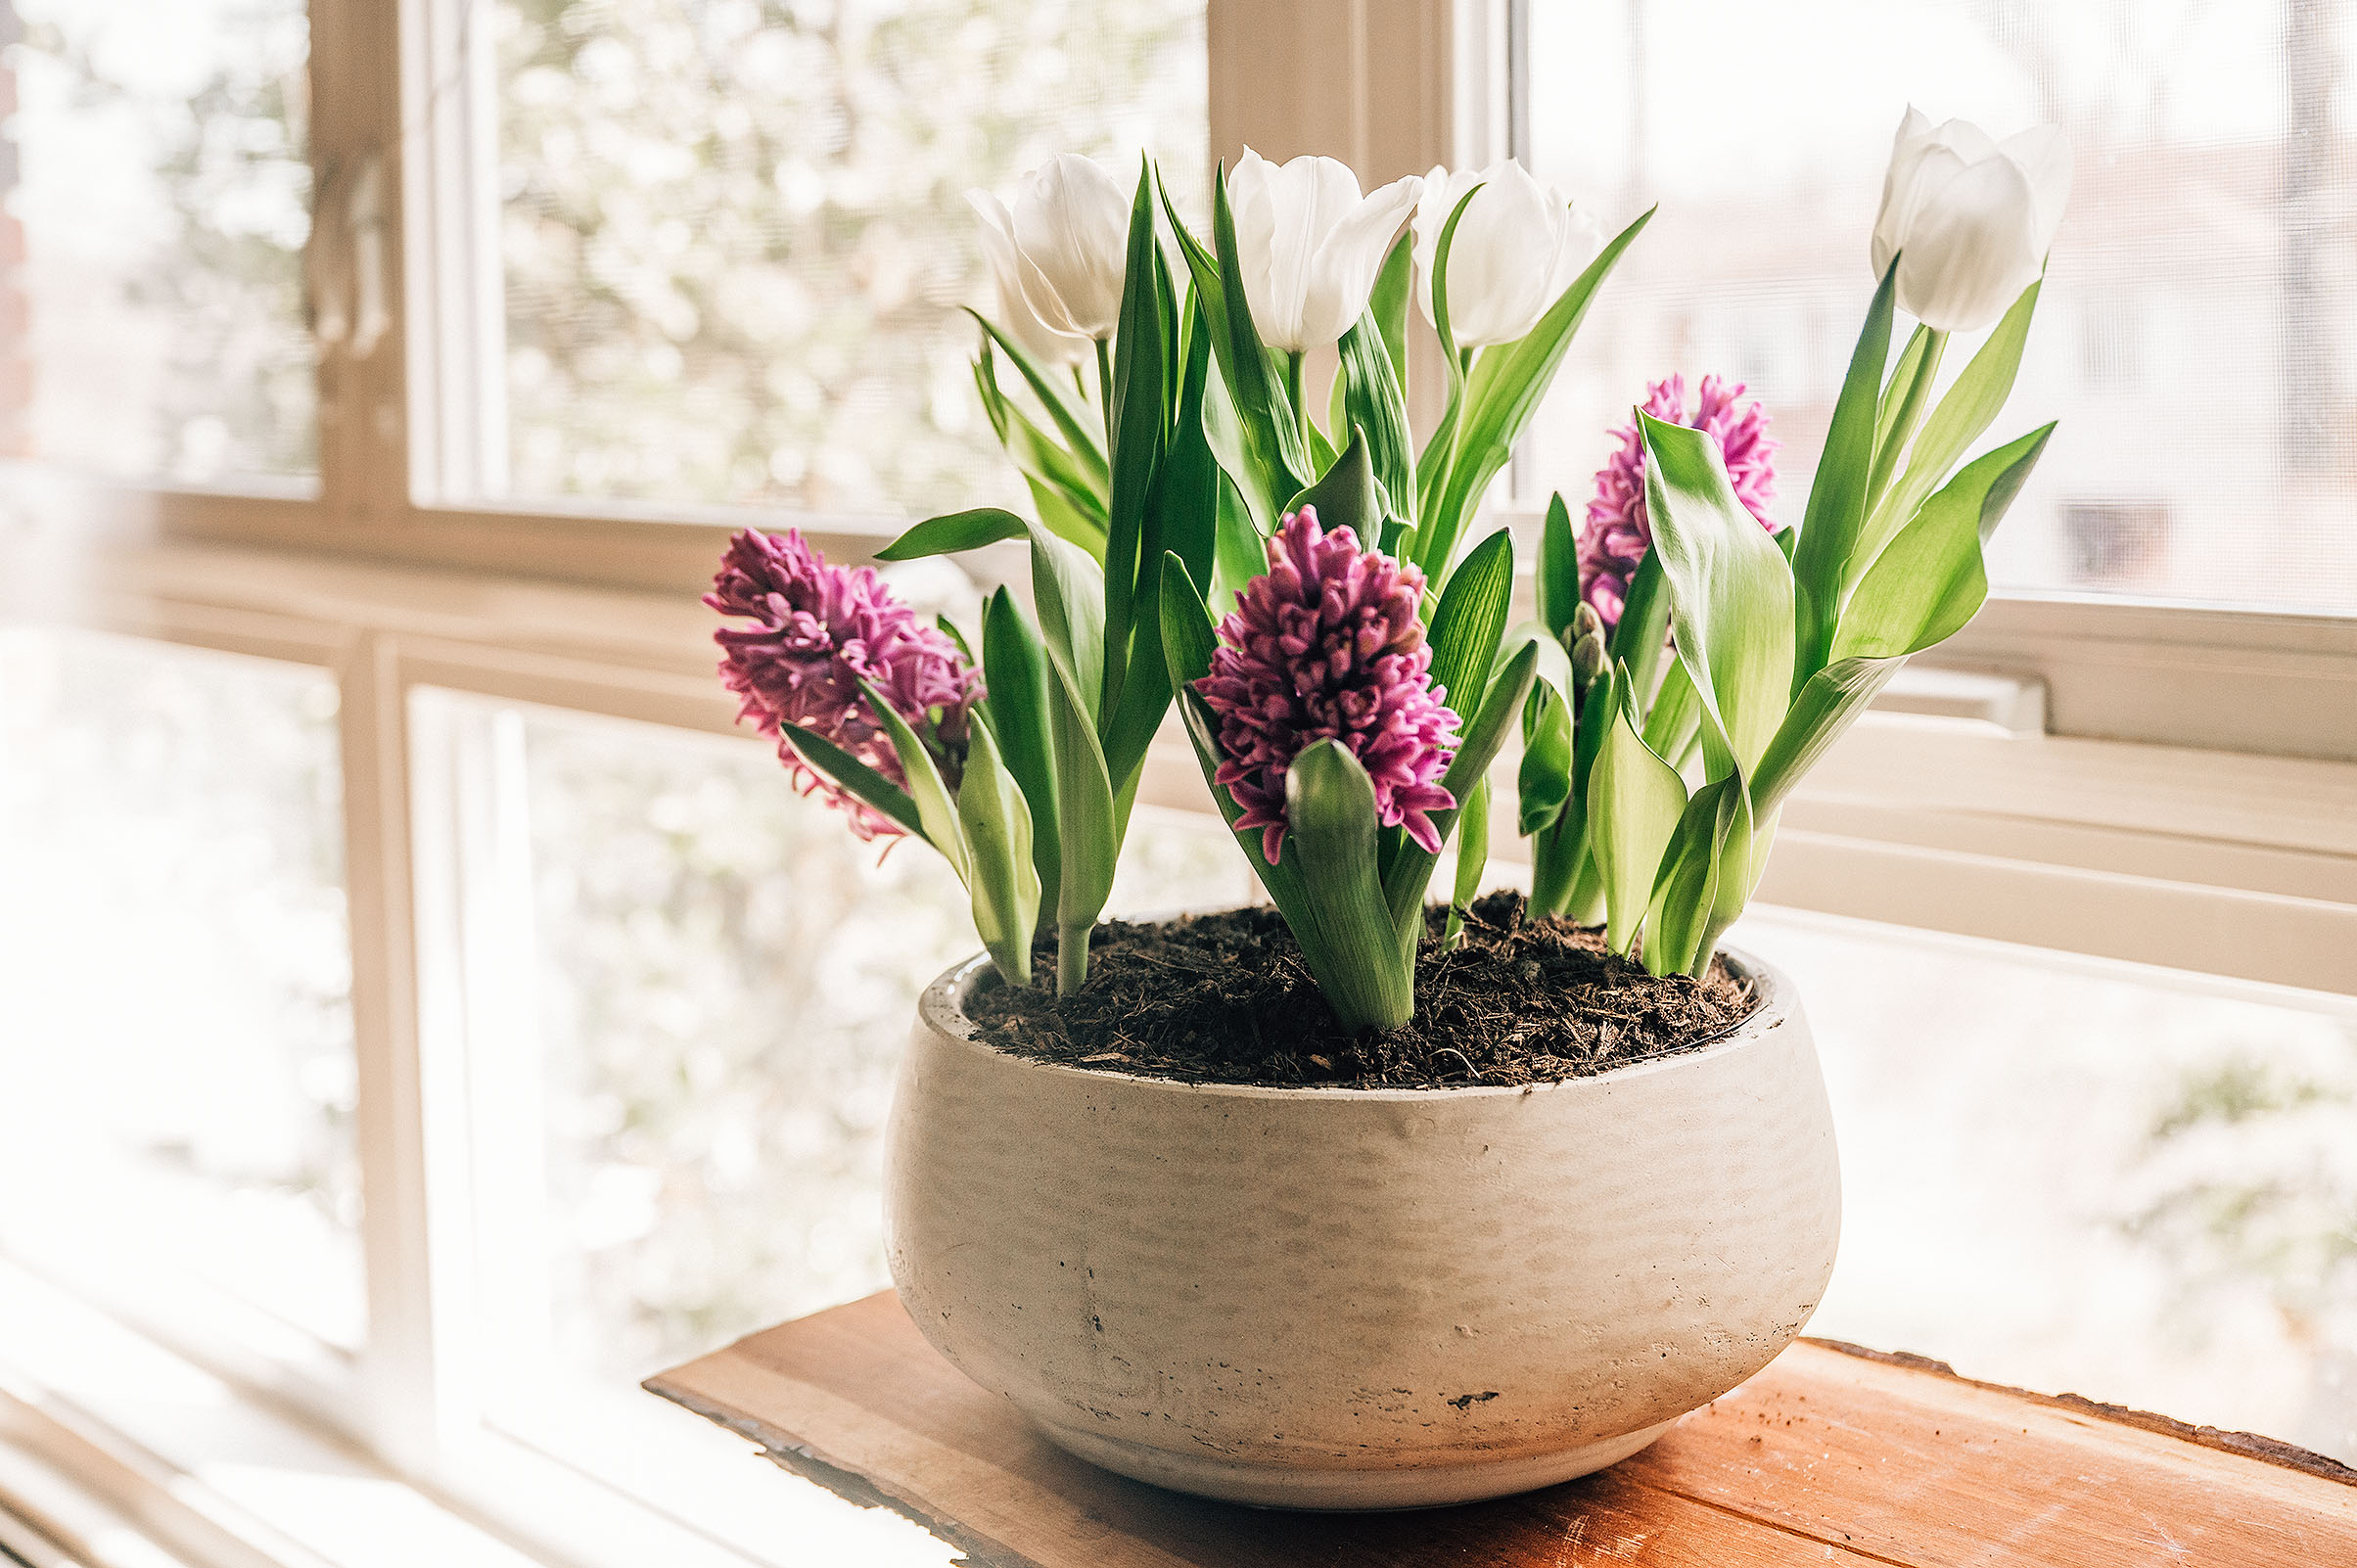
You’ll also want to have some variety of textures and colors. You can choose any color combination you wish but I find that different color patterns work well together rather than having purple tulips & hyacinths.
If you stick with the tulips and hyacinths, you’ll have different heights too. If you’re choosing another variety of plants, I suggest look for some tall and some shorter plants just for visual appeal.
Soil
You can pick any soil you’d like, I’ve listed a few below for you in my LTK shop. I try to find a potting mix that is good for flowers and moisture control. For this planter I used Back to the Roots Organic Potting Soil because it already had some that I had grabbed the week before from Target.
Potting Mat
These are optional but I have one on hand so I use it to keep my soil (and mess) contained while working with my flowers.

I’ve linked some of my favorite shallow planters and garden soil here for you. You can also find Tulip bulbs and the hyacinths as well. However, they’ll probably be cheaper at your local stores than on-line.
Step-By-Step Guide
Plan & Gather Supplies
After reading through my materials list, you’ll want to plan what your container garden will look like, the florals, colors, and what planter you’ll want.
Set Up Your work Station & Prep

Once you have all your supplies you’ll create your work station. I used my outdoor patio table to avoid making too much of a mess inside but you can do this project anywhere you’d like. If you’re using a potting mat, place it on your workstation to hold your supplies.
First, you’ll want to prep your container (planter). My planter had a drain hole but I decided to get a plastic liner as well. If you’re using a linger, you’ll want to add multiple holes to ensure proper drainage.
**Make sure also just add a dish underneath to catch the water if using indoors!
Next, cut open your soil and add a thin layer to the bottom of your planter.
Prepare Your Plants
Now that your workstation and planter are prepped it’s time to get your hands dirty.
You’ll massage the nursery pots that your plants are in to loosen up the soil and then take them out containers and place them onto your work surface.

It’s time to separate the bulbs from each other. Gentle shake off an excess dirt and them split your plants, one by one. The image above shows all the plants separate into singular bulbs.
Floral Design
Now comes the fun part, designing your container garden. Initially I thought I wanted my hyacinths in the middle with the tulips on the outside but as I placed them I realized that I couldn’t see my hyacinths because they were shorter. I played around with their positioning within the container a few times until I was pleased with their placement.
I ended up putting my hyacinths on the outside with tulips in between them and I also placed two tulips at the center of my container to make sure I had plants across the entire container and not just my boarder.
Top off Your Container
After you’ve decided where you’d like your florals placed within your garden, it’s time to add potting soil to cover them up. Make sure you are gentle while adding soil to avoid breaking any stems.
Additionally, you can add moss if you’d like for the aesthetic but it’s not necessary. I didn’t add any to mine, I preferred the true garden look.
After your soil is added, you may have some soil along the rim of the container, I just brushed it off for a cleaner look.
Lastly, top off your new garden with water to hydrate your plants.
Decorate
Now that your container is done, it’s time to find it a home, you can place it indoors, or outdoors, any space you’d like to bring a little spring to!
Don’t forget to add a dish below to catch your water, there’s nothing worse than a warped countertop from water damage (trust me, I’ve done it).
I added my container garden to the table behind my couch and love the pop of color in that space. Even my husband commented how nice it looked which coming from a guy, means a lot! I just love having flowers in the house this time of year, it immediately brightens up the space.


This indoor spring garden was so much fun to make. The kids and I have even talked about the tulips, they open their blooms in the morning and close them at night which is fun to watch.
I hope this article has inspired you to make your own indoor spring container garden this year!
Frequently Asked Questions
Which tulips should I choose?
When picking your tulips, I recommend getting bulbs that you cannot yet see the color of. If your plant is full of green your plant will last longer.
If you can already see the color of your tulip blooms, you’ll probably have a lifepsan of 1-2 weeks.
Stay In Touch!
If you’re propagating houseplants this season, be sure to read my Guide to Propagating Monstera’s in Water for some helpful tips.
You can find some of my favorite houseplant care essentials here.
For more inspiration on nurturing homes & hearts for the season, join me on Instagram, Facebook, Pinterest, & YouTube !