
Homemade Peppermint Bark Oreos
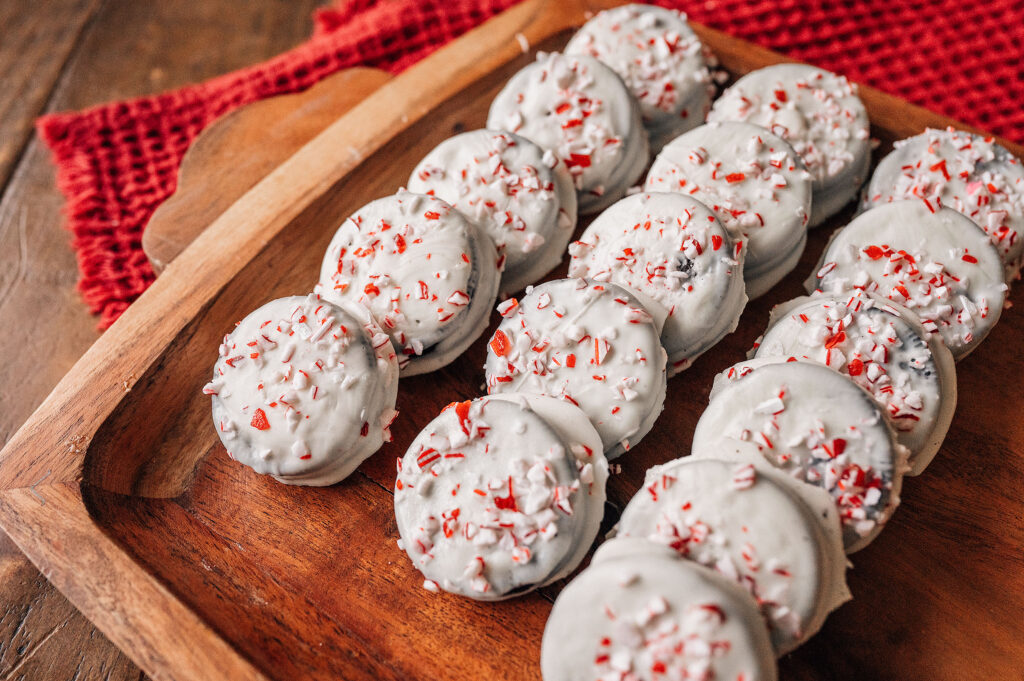
Learn how to make Homemade Peppermint Bark Oreos with this simple recipe! Oreos are dipped in smooth white chocolate and topped with crushed candy canes for the perfect festive treat. Easy, delicious, and ideal for holiday parties or gifting!
10 Days of Christmas Treats

On the 5th day of Christmas treats, my kitchen gave to me…
Five Peppermint Bark Oreos!
Only kidding, I couldn’t help myself! I have that song stuck in my head.
Welcome back to my 10 Days of Christmas Treats, today we’re making Homemade Peppermint Bark Oreos.
If you’re new here, welcome! My inspiration for this 10 Days of Christmas Treats series came from a love of creating festive desserts that bring holiday magic into our home. I wanted to provide a variety of recipes — some super simple for beginners and others with a bit more challenge for those who enjoy baking.
Today’s treat is so easy the kids can join in!
10 Days of Christmas Treats: Day 5 – Peppermint Bark Oreos

These Homemade Peppermint Bark Oreos are inspired by two things: the classic peppermint bark we made for Day 2 and my kids’ love for their favorite store-bought cookies – OREOS.
With just a few ingredients, creamy white chocolate, a sprinkle of crushed candy canes, and the iconic oreeos, this treat brings it all home with a sweet and delicious treat.
It’s a simple, festive twist on a holiday classic that’s perfect for little hands to help create and even better to enjoy together!
Homemade Peppermint Bark Oreos Recipe

These Homemade Peppermint Bark Oreos combine crunchy Oreos, smooth white chocolate, and a sprinkle of crushed candy canes for the perfect festive treat. Quick, easy, and kid-friendly, they’re ideal for holiday parties, gift-giving, or a sweet snack to enjoy together!
Supplies You’ll Need
- Parchment Paper: Ensures your Oreos easily lift off without sticking.
- Mixing Bowl: Perfect for melting and dipping your white chocolate.
- Small Tongs: Great for turning the Oreos in the chocolate and removing them easily; a spoon works too if you prefer.
- Spatula: For stirring your melted chocolate.
Ingredients
- Package of Holiday Oreos (you can also use regular if you prefer)
- White Melting Chocolate
- Crushed Peppermint (candy canes)
Step-by-Step Instructions
- Prepare your surface by lining your counters with parchment paper or placing a sheet of parchment paper on a baking tray.
- Spray a medium-sized bowl with non-stick cooking spray and pour in the white chocolate candy melts.
- Melt the chocolate in 15-second increments in the microwave, stirring between each round, until smooth and fully melted.
- Drop one Oreo into the melted chocolate at a time. Use small tongs (or a spoon) to turn the Oreo over and coat it fully in the chocolate.
- Remove the Oreo with the tongs, allowing excess chocolate to drip off into the bowl, then place it on the parchment paper.
- Top with crushed peppermint as desired while the chocolate is still wet.
- Repeat the steps for each Oreo until your batch is complete.
- Let the Oreos set until the chocolate hardens, then enjoy or package them for gifting!
Homemade Peppermint Bark Oreos
Description
These Homemade Peppermint Bark Oreos combine crunchy Oreos, smooth white chocolate, and a sprinkle of crushed candy canes for the perfect festive treat. Quick, easy, and kid-friendly, they’re ideal for holiday parties, gift-giving, or a sweet snack to enjoy together!
Ingredients
- One package of holiday oreos
- white melting chocolate
- crushed peppermint
Instructions
- Prepare your surface by lining your counters with parchment paper or placing a sheet of parchment paper on a baking tray.
- Spray a medium-sized bowl with non-stick cooking spray and pour in the white chocolate candy melts.
- Melt the chocolate in 15-second increments in the microwave, stirring between each round, until smooth and fully melted.
- Drop one Oreo into the melted chocolate at a time. Use small tongs (or a spoon) to turn the Oreo over and coat it fully in the chocolate.
- Remove the Oreo with the tongs, allowing excess chocolate to drip off into the bowl, then place it on the parchment paper.
- Top with crushed peppermint as desired while the chocolate is still wet.
- Repeat the steps for each Oreo until your batch is complete.
- Let the Oreos set until the chocolate hardens, then enjoy or package them for gifting!
How to Store Peppermint Bark Oreos

To keep your Homemade Peppermint Bark Oreos fresh and delicious:
Room Temperature
Store them in an airtight container at room temperature for up to 1 week. Keep them in a cool, dry place to prevent the chocolate from melting.
Refrigerator
If you prefer, you can store them in the fridge for up to 2 weeks. Just place them in a sealed container to keep them from absorbing any fridge odors.
Freezer
For longer storage, freeze the Oreos in a freezer-safe container for up to 2 months. Let them come to room temperature before serving to enjoy their full flavor and texture.
These treats store beautifully, making them perfect for holiday gifting or prepping ahead for festive gatherings!
A Fun Twist: Messy but Beautiful Creations
One of the best parts about making these Homemade Peppermint Bark Oreos was letting my kids join in on the fun!
Instead of crushed candy canes, they went all out with colorful sprinkles, creating their own festive versions. Their Oreos might be a little messier than mine, but they’re just as beautiful in their own way — and so full of charm.
See pictures below of their messy but wonderful creations — proof that this recipe is a perfect way to get the whole family involved in making sweet holiday memories!

Wrapping Up Day 5: Peppermint Bark Oreos
These Peppermint Bark Oreos are a holiday dream come true! With a crisp chocolate coating, a layer of creamy peppermint bark, and a sprinkle of crushed candy canes, they’re as festive as they are delicious. Perfect for cookie exchanges, gifting, or just savoring with a cup of hot cocoa by the fire.
Make a batch for your next holiday gathering, and don’t forget to pin this recipe for when the holiday cravings hit!

If you missed yesterday’s recipe, we turned store-bought cinnamon rolls into the coziest bakery style gooey cinnamon rolls—perfect for your holiday breakfast table and easy!!

Come back tomorrow for Day 6, where I’m sharing a festive, no-bake holiday treat that’s dipped, decorated, and perfect for adding some Christmas magic to your table!
Be sure to follow me on Instagram, Facebook, Pinterest, and YouTube so you don’t miss the rest of the 10 Days of Festive Christmas Treats.
Sweet wishes and happy baking! – Tandra