
DIY Easy Balloon Garland Tutorial
So you’re ready to take on a DIY balloon garland? Look no further, this is the ONLY diy balloon garland tutorial you will ever need.
Whether you’re throwing a birthday party, baby shower, wedding shower, or another event where you want to wow your guest, these beautiful diy balloon garlands are not only easy to make but they make a huge statement.
Table of Contents
DIY Balloon Garland
Balloon garlands have become a party decor trend the last few years. At first, most of the balloon garlands were only made by professional party planners but now with a little work you can bring the magic to your own parties on a budget.
Materials You’ll Need
- Balloons
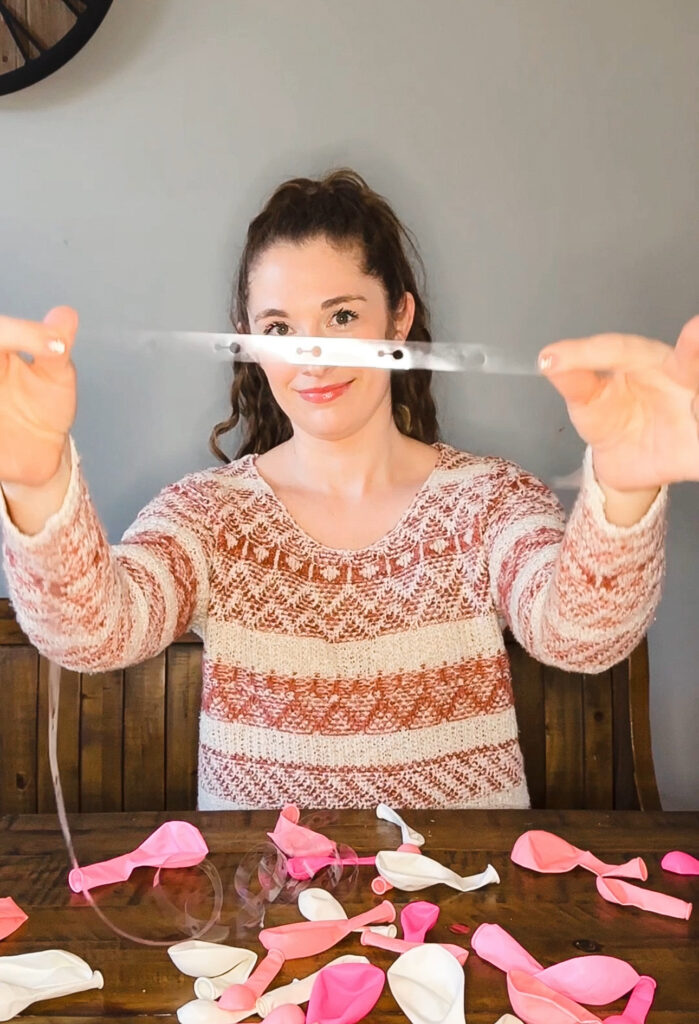
- Balloon Garland Strip
- Electric Balloon Pump
- Balloon Sticky Dots
- Command Hooks
- Fishing String
You can find all these items listed in my Amazon Storefront for your convenience.
Step-By-Step Tutorial
Step 1: Theme & Color
Theme
First you’ll want to decide on a theme for your ballon garland. The sky is the limit when it come’s to deciding on a theme, if you can dream it, you can make it into a balloon garland. One of my favorite places to look for inspiration on balloon garlands is Pinterest!
Color Scheme
Once you decide on a theme, you’ll want to pick a color scheme. While deciding on a color scheme you’ll also want to decide are you doing a pattern of colors or one solid color.

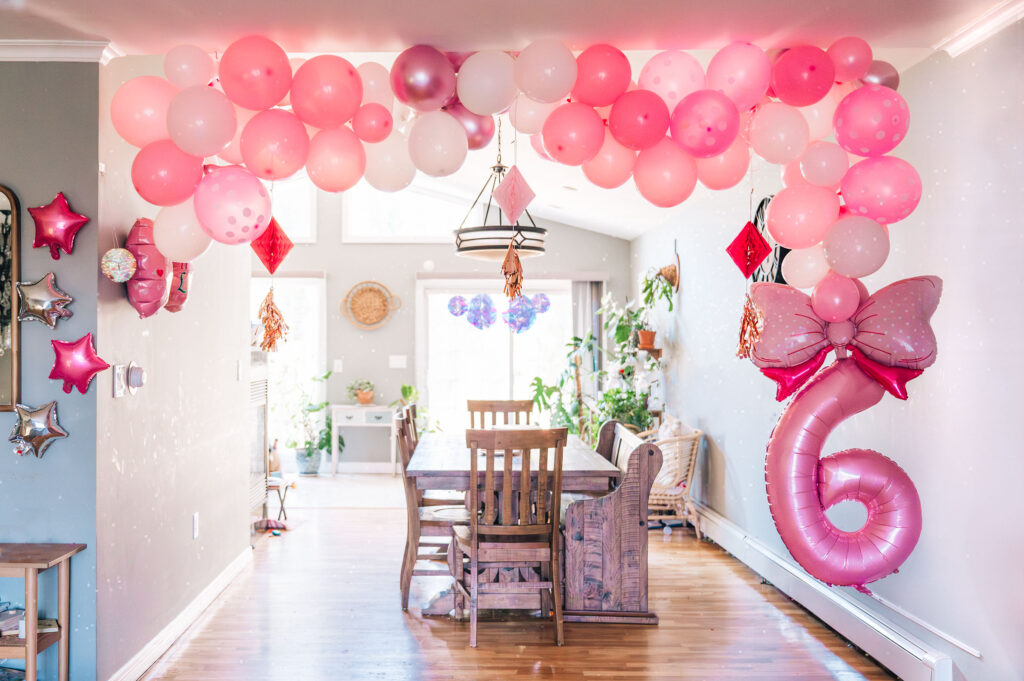
Here are a few of the balloon garlands we’ve done in our house. Pink has been a top favorite for the girls the last two years and I love the monochromatic pink look.
Step 2: Sourcing Materials
In my experience Amazon has probably the best selection of balloon garland kits at affordable prices. Almost all of our balloon garlands I’ve made in the past year have been from Amazon. I’ll but extra pieces to bring the magic with smaller decor from Target, Party City, Michaels, Hobby Lobby, and sometimes even Home Goods.
The nice thing about Amazon is that you can buy an entire ballon garland kit which will include your balloons, the garland tape, and sticky dots.
**If you prefer to buy your balloons individually without using a pre-made kit you’ll want to buy a variety of small, medium, and large balloons.
You can always stick with one color but in my experience adding a few colors (even if it’s just different shades of one color) to your balloon garland gives them more of an eye catching look. You can see an example below, I stuck with pink for the theme but used hot pink, pink, light pink, & white balloons for an ombré feel.

Step 3: Prep
It’s time to prep! I’m usually making all my balloon garlands in the wee hours of the night. I lay my balloons out on the floor in the pattern I’m planning to do. This part you want to prep ahead, think about how you want your garland to look. Sometimes I do a repeating pattern (pink, purple, white) this last time I did groups of color. I did a large group of pink balloon, a medium group of white balloon, and then my center was purple, then back to medium group of white, and the opposite end with a large group of pink.
Once you have your garland pattern establish, grab your electric balloon pump because we are ready to assemble the balloon garland.
Step 4: Assemble
There are options for assembly.
- Inflate ALL balloons and then attach to garland.
- Inflate a balloon and then attach to string, repeat until garland is full.
My personal choice is the second, inflate a balloon, attach to strip, repeat.
I prefer this method because I can watch my garland evolve and decide if I want to switch balloon sizes or my pattern. Also, when I blow up too many balloons at once, more times than not several will pop while rolling on my floor before they make it to the strip.
Inflating Balloons
I have used a variety of ways to inflate balloons. The first time I thought I was going to blow up balloons without any pumps. I was lightheaded and it was awful. Within minutes I was looking at options on how to blow them up.
I’ve used my husband’s air pump from the garage. This is an option but it’s loud and annoying.
Save yourself and if you plan to do more than one garland, invest in an electric balloon pump.
No products found.
Attaching Balloons to Garland Strip
The garland strip hole has a large end and small end to each hole. You’ll insert the balloon knot into the large end and slide it down to the smaller end to lock it into place.
Some people prefer to only put the medium and large balloons onto the strip directly and then use sticky dots to add in the smaller balloons as needed.
I like to keep it simple and just place all balloons onto the strip making sure I vary the size of balloons in my design.
Step 5: Hang Your Garland
Now that your garland is assembled, you’ll be hanging it up. Again, you have so many options for hanging your garland and it all depends on your location.
- You can attach it to a staircase easily with zip ties.

- If you plan to attach it to a wall, you’ll want to use command hooks and fishing string. I’ve written an entire step-by-step tutorial “Easiest Way to Hang a Balloon Garland on Your Wall.”

- They now also make balloon arches that you can easily find on Amazon and I’ve also seen them at Party City.
No products found.
Step 6: Enjoy!
Your garland is complete and hanging and not it’s time to enjoy your garland and all of its beauty.
The balloon garlands are so much easier to make than you’d initially think and you can customize them for any occasion!

Once our parties are over I love to repurpose the garlands and hang them in the kids rooms or in the playroom to give it a second life.
If you really want to give it a second life you can also post in your local facebook groups to see if anyone is interest rehoming your balloon garland. You’d be surprised how many people would snag a premade balloon garland.
Add to the Party
If you’re wanting to add a special drink to your party, check out my Sangria Mocktail recipe that is always a hit with the kids.
Keep Up With Me
For more inspiration on adding magic to your everyday life, join me on Instagram, Facebook, Pinterest, & YouTube !
Last update on 2026-07-21 / Affiliate links / Images from Amazon Product Advertising API