
Organizing a Changing Table: Tips from a Mom of 5
A well-organized changing table makes those endless diaper changes easier. As a mom of five, I’m sharing my simple, practical tips for keeping everything within reach while creating a cozy, stress-free space for you and your baby.

Diaper changes are a constant part of life with a little one, and having an organized changing table can make all the difference.
As a (soon-to-be) mom of five, I’ve learned what works (and what gets in the way) when it comes to keeping this space tidy and functional.
A well-stocked, thoughtfully arranged changing table doesn’t just save time. It also creates a cozy, stress-free routine for both you and your baby.
Whether you’re setting up a nursery for the first time or looking to simplify your current setup, these tips will help you create a practical and inviting space.
Choosing a Changing Table
Over the years, I’ve used everything from a pack-and-play to a traditional changing table and now a dresser as my go-to diaper station.
Each setup had its pros and cons, but I’ve learned that the best choice depends on your space, lifestyle, and what makes diaper changes easiest for you.
A pack-and-play with a built-in changing station is great for small spaces or keeping in a shared room, while a traditional changing table offers dedicated storage but takes up more room.
With my firstborn, I won a pack-and-play at a baby shower weekend held at our local mall. I was so grateful for it, and it worked well at the time.
Now, I prefer using a dresser with a changing pad on top, it’s practical, saves space, and grows with my baby.
No matter which option you choose, the key is finding a setup that keeps essentials within reach while fitting seamlessly into your daily routine.
You can read a more in depth blog post about the different types of changing tables along with their pros and cons here.
Everything You Need for a Smooth Diaper Change
After five babies, I’ve learned that you really don’t need a million things at your changing table, just the right ones.
Here’s a breakdown of the must-haves I always keep close by, plus a few little extras that have made life easier along the way
Must-Have Essentials for Your Table

These are the essentials I keep stocked on (or right by) our changing table to make diaper duty quicker, smoother, and just a little more manageable, especially during those middle-of-the-night changes.
Diapers: Obviously, you’ll need diapers, lots of them. I like to start with 1–2 boxes each of newborn and size 1 because you never really know what you’re working with until that baby arrives. Most of mine were chunky 8-pounders who flew through newborn sizes in a week… except baby #5, who came early and rocked them for three weeks.
Wipes: Just like diapers, you’ll go through these fast, so stock up! I always reach for Pampers Sensitive since my girls had sensitive skin, and now it’s what I use for everyone. No need to overthink it, find what works and stick with it.
Diaper Cream: You never know if your little one will end up with a diaper rash so I always like to have some in my basket “just incase.” My favorite is the Boudreaux’s Butt Paste.

- Changing Pad & Covers: I used a dresser for a changing table and love the changing pad. I also purchased a few covers just incase we have any accidents or need a wash day.
Nice-to-Haves (But Not a “Must-Have”)
These aren’t really what I’d consider essentials, but they’ve made diaper changes a little easier (or just a little mre enjoyable, if that’s possible) for us. If you’re tight on space or budget, you can absolutely skip them but if you’re setting up your dream station, they’re worth considering!
- Diaper Pail: If your changing station isn’t near a trash can (like mine) a diaper pail keeps everything contained and cuts down on smell. I used a small trash can with the first four kids and now that I’ve used a daiper pail with my 5th, I wish I would’ve had it with all the kids.
No products found.
- Diaper Caddy: My diaper caddy is actually just a wicker basket I found at HomeGoods. I wanted something small that would fit ontop the dresser but if you have a bigger space they do make dedicated diaper caddy’s with compartments to keep you organized.
No products found.
- Diaper Cream Applicator: Now this one isn’t necessary but let’s just say it’s worth having in your basket! The diaper cream can be thick and hard to get off your hands. This applicator makes the whole process less messy and easier to clean up.
No products found.
- Wipe Warmer: This one I have mixed feelings about. It’s not a necessary item but if you have a baby in the colder month it would be really nice for baby. I used it the first few weeks with baby #5 since it was still chilly but now that we’ve reached higher daily temps I don’t reach for it anymore.
No products found.
- Nightlight: I have an adjustable light the kids bought me for christmas that I love using for daiper changes. You’ll want a soft light, especially for the middle of the night changes so that you don’t fully wake baby.
- Hand Sanitizer: It’s nice to keep a bottle of sanitizer nearby or in the diaper caddy incase you have a messy change, you’ll be able to clean your hands right away.
- Extra Onesies: Sometimes you’ll need to have a onesie within arms reach when baby has a blow out.
My Changing Table Setup + Organization Tips
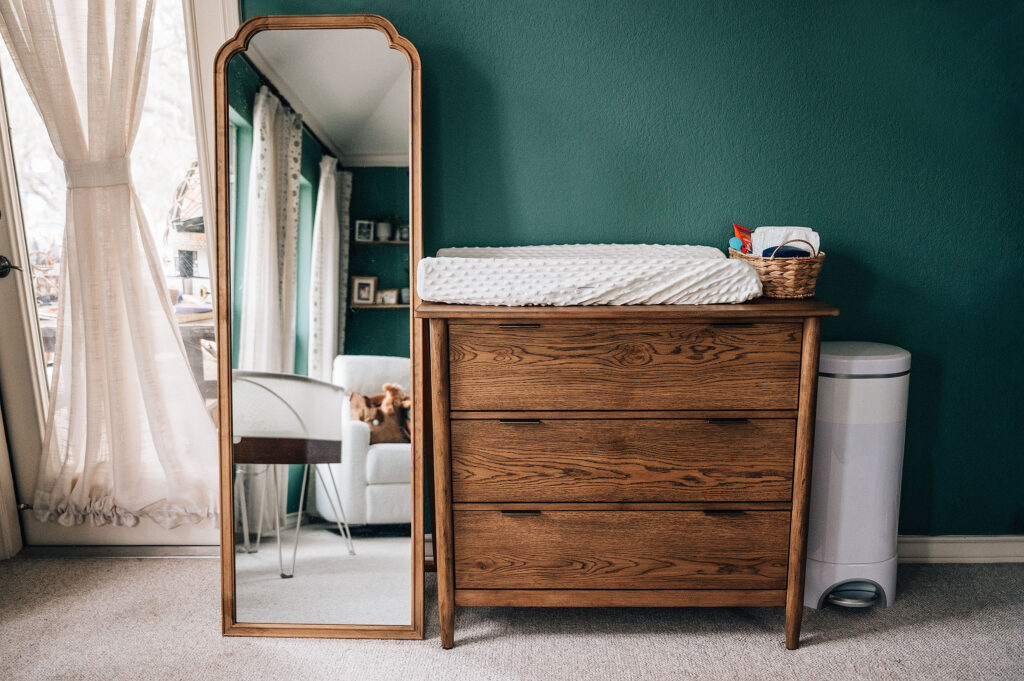
Before we dive into exactly how I organize everything, here’s a look at my setup.
Over the years, I’ve learned that the best changing table setup is the one that keeps the essentials close and the clutter out of the way.
Instead of a traditional changing table, I chose a simple dresser with three drawers and beside it, I keep a diaper pail for easy clean-up.
It’s nothing fancy, just a setup that makes diaper changes feel a little easier and keeps everything within arm’s reach.
What I Keep on Top
I organize ours changing talbe with the everyday basics right on top and within easy reach starting with little my little caddy.

It’s a simple system that keeps everything within arm’s reach, Which makes those middle-of-the-night changes so much smoother.
As I mentioned above my diaper caddy is just a small wicker basket I found at HomeGooods but you can always go the more traditional route too and buy a typical diaper caddy.
In addition to my diaper caddy, I have a changing pad and waterproof cover.
Inside the wicker basket, I keep everything I reach for during diaper changes, along with a few extras I like having close by.
Diapers, wipes, any ointments we might need, my trusty diaper cream spatula, and pacifiers for those middle-of-the-night changes when you’re trying to keep the house quiet.
After our baby boy’s circumcision, we also kept Vaseline and Q-tips in here.
Maybe a few other little things I’m forgetting but you get the idea!
Top Drawer: Grab-and-Go Essentials
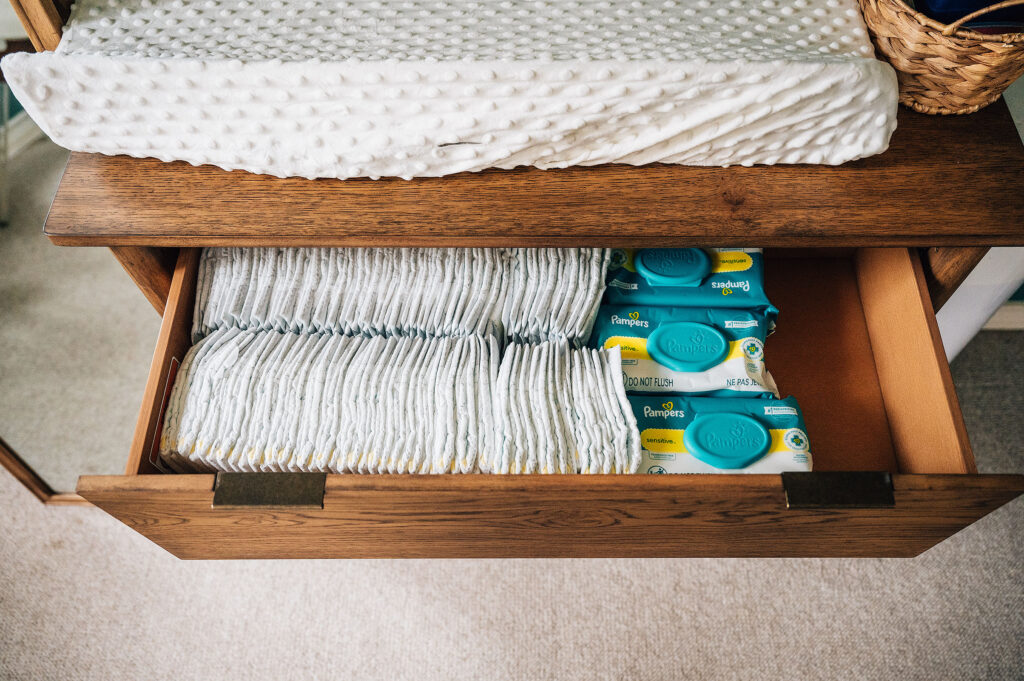
This drawer is my little restock station for the diaper caddy on top. I keep extra diapers and wipes tucked in here so they’re always within easy reach. Newborns go through so many diapers, so having backups close by makes those constant changes just a little bit easier.
Middle Drawer: Baby Clothes

This drawer is reserved for all those tiny newborn clothes. During those first few weeks at home, we went through more outfit changes than I could count.
It’s so convenient having them right at the changing table especially for those moments when your little one decides to surprise you mid-change (trust me, it happens!).
The left side has my newborn onesies, the middle section has a few cute tops & bottoms that go together, and then the right side keeps 0-3 onesies for when baby has a growth spurt and is ready to size up.
Bottom Drawer: Sleep Essentials & Storage

This is my catch-all for all the extras, mostly sleep stuff.
I’ve got extra bassinet sheets, backup changing pad covers (because let’s be honest, accidents are basically a given), diaper pail bags, and even a spare lovey. Trust me, when they get attached to that one special one, you’re going to want a backup ready to go.
I also keep a few zipper sleep sacks in here for those cooler nights or when I want to bundle him up a little more for naps.
Extra Organizers You Might Love
Although for this baby I decided to keep it simple with a dresser and changing pad setup, I wanted to share a few other organizing products I’ve either used in the past or seen other moms rave about.
Every space (and every baby!) is different, so if you’re looking for extra ways to keep your changing station organized, these might be worth checking out.
3-Tier Carts: If you’re looking for a mobile changing station or just an easy way to store extra baby items, a 3-tier cart is a great option.
The wheels make it easy to move around the house, and you can customize it with dividers to fit your needs.
I love the idea of keeping a diaper caddy on top and using the lower shelves for things like extra clothes, wipes, or burp cloths
No products found.
Drawer Dividers & Organizers: If you’re using a dresser or drawers for your changing station, drawer dividers can help keep those tiny baby items in their spot without spilling over and becomin messy. The drawer organizers can be especially helpful for keeping those tiny outfits neatly organized.
No products found.
Storage Baskets: If you’re using a cart, storage baskets may be the way to go to keep a tidy station.
No products found.
Reorganizing & Growing With Your Baby
One thing I’ve learned? As your baby grows, your organization (and your needs) will grow right along with them.
What worked perfectly during those sleepy newborn days might look completely different just a few weeks later.
Right now, my little guy is almost two months old, and already I’ve had to shift things around.
My diaper caddy doesn’t even hold diapers anymore, he’s sized up! Now I use the basket for diaper cream, hand sanitizer, lotion, wipes, vitamin D drops, and a few pacifiers. The diapers (and backup wipes) have taken over the top drawer instead.
And honestly, I know it’ll keep changing. As he starts teething, I’ll probably add teething toys and bibs. It’s all about adjusting your space to fit the season you’re in, and giving yourself permission to rearrange things as often as you need.
A little flexibility goes a long way during these baby days!
Creating a Space That Works for You
My hope in sharing how I organized our changing table is that it sparks ideas for your own space. But at the end of the day, the most important thing to remember is this: create a space that works for you and your baby.
It might look a lot like mine, or it might look completely different, and that’s more than okay.
Every family, every home, and every baby is a little different. Some moms may love having everything tucked neatly into drawers, while others might prefer open baskets they can grab from in a second.
Some babies need extra swaddles and pacifiers within reach, while others barely use them at all.
Your setup might shift as your baby grows, or as you figure out what makes diaper changes quicker and easier in the middle of the night.
Give yourself permission to tweak it, change it, and rearrange it as many times as you need.
At the end of the day, it’s not about creating a picture-perfect nursery, it’s about building a space that feels functional, comforting, and right for your everyday life.
If you’re setting up your changing space, I’d love to hear what you’re including! Comment below or pin this post to come back to later!
For more on motherhood, cozy recipes, homemaking tips, and seasonal inspiration, be sure to follow me on Instagram, Facebook, Pinterest, and YouTube.
Hope this gave you a few ideas to make your space work for you!
Xoxo, Tandra
Last update on 2026-07-18 / Affiliate links / Images from Amazon Product Advertising API