
DIY Flower Bracelet: Easy Outdoor Fun for Kids
Looking for a simple and fun outdoor craft? This DIY Flower Bracelet is the perfect nature-inspired activity for kids! Using just tape and fresh flowers, your little ones can create their own wearable art while exploring the beauty of nature. A no-mess, hands-on way to spark creativity and enjoy the outdoors!

Remember back when we were under COVID lockdowns? Hard to forget, right? During that time, I was at home with three little ones, all ages 3 and under.

Like so many parents, I was desperate for ways to get them outside somewhere safe, something simple, anything to break up the long days.
That’s when we started doing nature walks. My kids would come home with their pockets stuffed full of tiny treasures, flowers, smooth rocks, anything they found special.
Then one day, I saw a post about making nature bracelets, and I knew it was perfect for us.
A little adventure, a little creativity, and best of all, no mess! My kids loved it, and it quickly became one of our favorite outdoor activities.
Now, I’m sharing this simple DIY flower bracelet with you. It’s an easy, low-prep way to slow down, explore nature, and make sweet memories with your kids.
Whether you’re looking for an afternoon activity or a way to add a little magic to your next walk, this craft is one you’ll want to try!
Why You’ll Love This Craft
- Simple, mess-free, and quick to set up.
- Perfect for nature walks or backyard adventures.
- Great sensory activity and hands-on fun for kids.
- No crafting experience necessary!
Supplies You’ll Needed
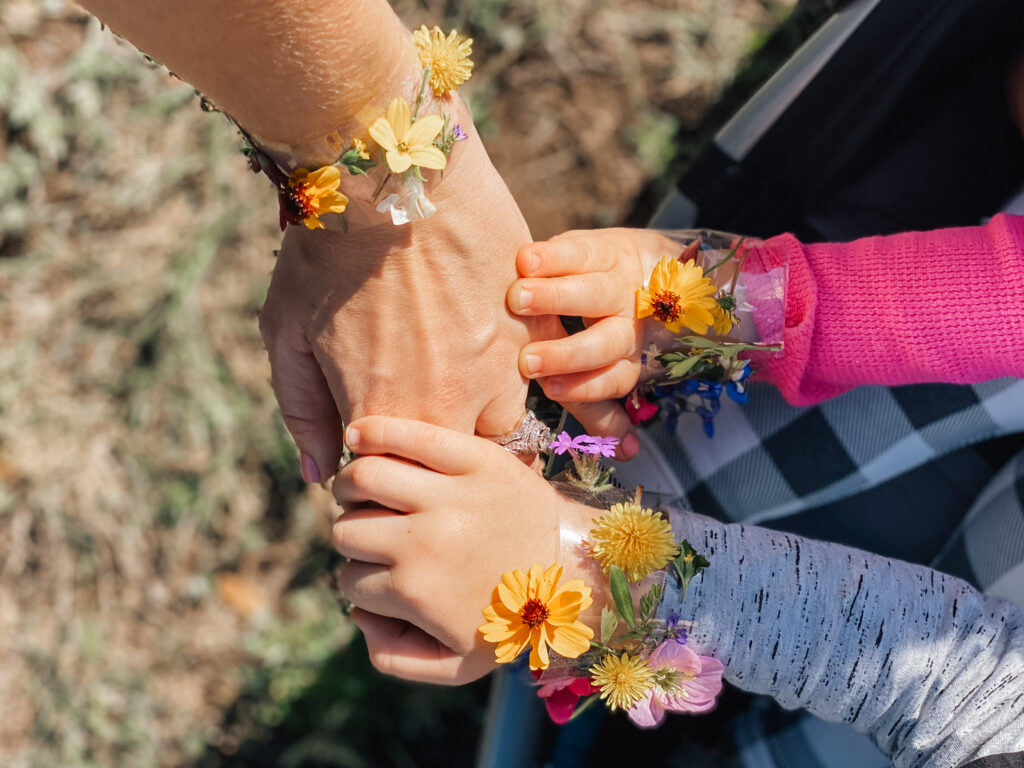
The best part about this activity is how simple it is, you only need clear packing tape (wide works best) and some fresh flowers (or leaves) gathered from your nature walk!
If you’d like to make them a little extra, you can always add string, ribbon, yarn, and glitter.

Step-by-Step Instructions
Making these nature flower bracelets is super easy! Follow this simple step-by-step tutorial to create a fun and beautiful accessory your kids will love.
Step 1: Gather your materials. You’ll need clear packing tape, wide works best.
Step 2: Measure packing tape. You’ll want to measure a piece of tape long enought to wrap around your child’s wrist with a little extra for overlap.
Step 3: Wrap the tape around the wrist. Place the tape directly around you child’s wrist, sticky side out. Make sure it’s not too tight, they should still be able to move their wrist around comfortably.
Step 4: Go on a nature walk! As you explire, encourage your child to find small flowers, petals, and leaves, or even those beautiful bird feathers to press onto their sticky bracelet. They can decorate it as they walk.
Step 5: Fill up the bracelet. Keep adding little nature finds until the bracelet is full or they’re happy with their design.
Step 6. Enjoy their nature creations. Admire their beautiful bracelet and a wearabe memory of your walk together.
Step 7. Optional Finishing Touch. If you want to protect the bracelet, use another layer of tape over the top to make the bracelet last longer.
Tips & Tricks
Look for small, flat flowers and leaves, they stick best!
Try different themes: only green leaves, all yellow flowers, or tiny petals.
Use this as an opportunity to talk about the plants and flowers they’re collecting.
(**If you don’t know what type of flower or leaf your child has picked, use your iphone to take a picture, then when you view the image, at the bottom of your screen there should be a circle).
Slow Down & Make Something Beautiful
And there you have it, a sweet little project that’s as fun to make as it is to wear.
Love this idea? Save this pin for later and have a fun outdoor craft ready to go!

My kids and I could spend hours outside, gathering flowers for their bracelets. They also twisting the stems into bracelets (or necklaces, or crowns, because why stop at one?).
There’s just something special about slowing down, getting a little dirt under your nails, and making something with your hands.
Whether you’re doing this with your kids on a sunny afternoon or taking a quiet moment for yourself, I hope these DIY flower bracelets bring a little extra joy to your day, like they do for us.
If you and your little ones loved making these flower bracelets, be sure to check out my How to to Welcome Spring with Kids, it’s full of simple, joyful ideas to make the most of this beautiful season together!

For more on motherhood, cozy recipes, homemaking tips, and seasonal inspiration, be sure to follow me on Instagram, Facebook, Pinterest, and YouTube.
Here’s to finding magic in the little things – Tandra