
Easy Homemade Fudge Recipe
Have you ever wanted to try your hand at a homemade fudge recipe but didn’t know where to begin? Fudge often gets a reputation for being tricky, but this recipe simplifies the process! With just a few basic ingredients and easy-to-follow steps, you’ll end up with rich, creamy fudge that’s perfect for gifting, sharing, or keeping all to yourself. Let’s take the guesswork out of fudge-making and whip up a treat everyone will love!

10 Days of Christmas Treats
The holidays are the perfect time to fill your kitchen with the sweet aroma of homemade treats! Welcome to 10 Days of Festive Christmas Treats, where I’m sharing fun, easy recipes to make your season even more magical. Whether you’re gifting, entertaining, or simply enjoying a cozy night in, these recipes will add a little extra sparkle to your holiday traditions.
Yesterday, we combined two classics, chocolate and peppermint, and whipped up Peppermint Bark.
Today, for Day 3, we’re diving into a homemade fudge recipe! This rich, creamy treat is simple, satisfying, and sure to become a holiday favorite. Let’s get started and make some sweet Christmas memories!
10 Days of Christmas Treats: Day 3 – Homemade Fudge Recipe

Welcome to Day 3 of 10 Days of Treats! Today, we’re spotlighting a holiday classic that never goes out of style: a homemade fudge recipe . With its rich, creamy texture and melt-in-your-mouth decadence, fudge is the ultimate sweet treat to enjoy during the festive season.
Whether you stick to a traditional chocolate base or get creative with flavors and toppings, it’s a dessert that feels indulgent yet simple to make.
Perfect for gifting, holiday gatherings, or sneaking a bite while wrapping presents, fudge is a crowd-pleaser that always delivers.
Get ready to whip up a batch of this timeless holiday favorite!
Homemade Fudge Recipe

Supplies You’ll Need
- Parchment Paper: Any brand of parchment paper will work, but I found the most festive paper at my local HEB.
- Wooden Spoon: Ideal for stirring and scraping the sides of the pan.
- Medium Sauce Pan: Perfect for melting and heating up your fudge.
- Measuring Cups & Spoons: To ensure precise measurements for the best results.
- 8×8 Square Pan: The perfect size for setting your fudge.
- Spatula: Great for spreading the fudge evenly into the pan.
- Dough Scraper (or plastic knife): My go-to tool for effortlessly cutting fudge, though a plastic knife will work if you don’t have one on hand.
Ingredients
- 2.5 cups sugar
- 3/4 cup unsalted butter
- 2/3 cup evaporated milk
- 2 cups semi-sweet chocolate
- 7 oz. marshmallow fluff
- 1 tsp vanilla extract
- Optional Toppings: Sprinkles, crushed candy canes, chopped nuts, mini marshmallows, chocolate drizzle, or crushed cookies
Step-by-Step Instructions

- Line an 8×8 square pan with parchment paper. Tip: Sprinkle a little water on the bottom of the pan to help the parchment lay flat—it works like magic!
- In a medium saucepan over high heat, combine the sugar, butter, and evaporated milk. Stir slowly with a wooden spoon as the butter melts, making sure to scrape down the sides of the pan while you stir.
- Bring the mixture to a full rolling boil over medium-high heat, stirring constantly. Once it’s boiling, set a timer for 5 minutes, then lower the heat to medium-low. Keep stirring the whole time—it’s worth the arm workout!
- After 5 minutes, take the pan off the heat and stir in the chocolate chips until they’re completely melted and smooth.
- Once smooth, add the marshmallow fluff and stir until fully combined.
- Finally, mix in the vanilla extract until it’s all blended together. Your fudge base is ready to go!
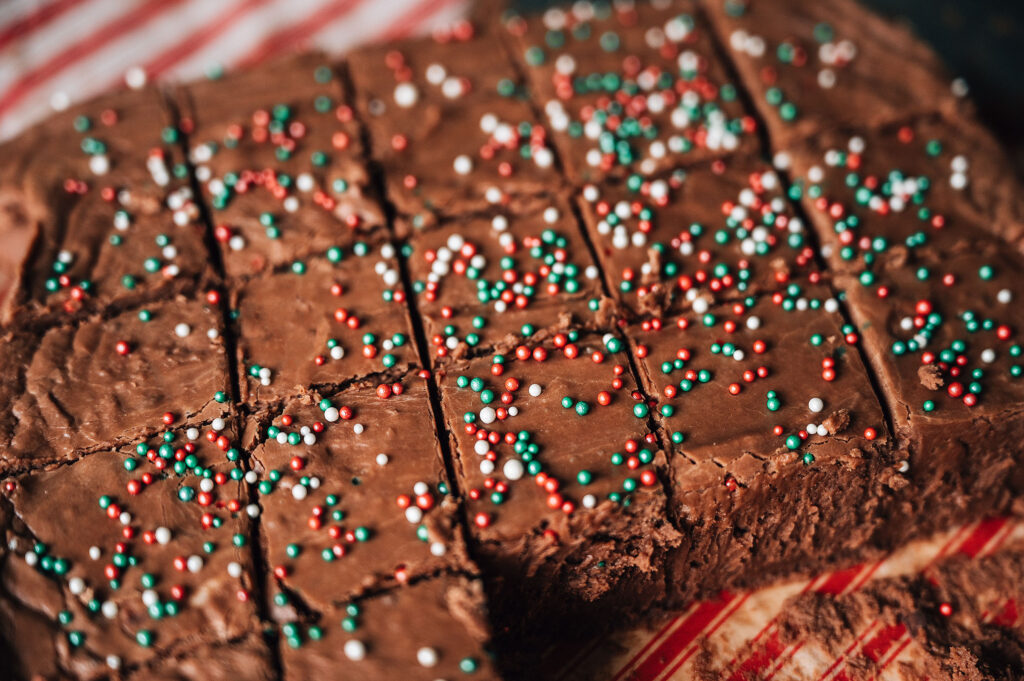
- Pour the fudge mixture into your prepared 8×8 pan and spread it out evenly to cool and set. You can also add optional toppings like sprinkles, crushed candy canes, chopped nuts, mini marshmallows, chocolate drizzle, or crushed cookies for a fun and festive touch!
Easy Homemade Fudge Recipe
- Total Time: 15 minutes
- Yield: 1 batch 1x
Description
This rich and creamy fudge is the perfect holiday treat! Made with simple ingredients and customizable with fun toppings like sprinkles or crushed candy canes, it’s easy to make and sure to impress. Perfect for gifting or enjoying with family!
Ingredients
- 2.5 cups sugar
- 3/4 cup unsalted butter
- 2/3 cup evaporated milk
- 2 cups semi-sweet chocolate chips
- 7 oz marshmallow fluff
- 1 tsp vanilla extract
Instructions
- Line an 8×8 square pan with parchment paper. Tip: Sprinkle a little water on the bottom of the pan to help the parchment lay flat—it works like magic!
- In a medium saucepan over high heat, combine the sugar, butter, and evaporated milk. Stir slowly with a wooden spoon as the butter melts, making sure to scrape down the sides of the pan while you stir.
- Bring the mixture to a full rolling boil over medium-high heat, stirring constantly. Once it’s boiling, set a timer for 5 minutes, then lower the heat to medium-low. Keep stirring the whole time—it’s worth the arm workout!
- After 5 minutes, take the pan off the heat and stir in the chocolate chips until they’re completely melted and smooth.
- Once smooth, add the marshmallow fluff and stir until fully combined.
- Mix in the vanilla extract until everything is blended together.
- Pour the fudge mixture into your prepared 8×8 pan and spread it out evenly to cool and set.
**You can also add optional toppings like sprinkles, crushed candy canes, chopped nuts, mini marshmallows, chocolate drizzle, or crushed cookies for a fun and festive touch!
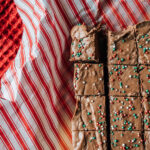
Let the fudge set completely before cutting into squares and serving. Enjoy!
- Prep Time: 5
- Cook Time: 10
- Category: dessert, candy, fudge, chocolate
How to Store Homemade Fudge

At Room Temperature
Store fudge in an airtight container, layering parchment paper or wax paper between pieces to prevent sticking. Keep it in a cool, dry place, and it will stay fresh for up to 1-2 weeks.
In the Refrigerator
For longer storage, place fudge in an airtight container or wrap it tightly in plastic wrap. It can last in the fridge for up to 3 weeks. Bring it to room temperature before serving for the best texture and flavor.
In the Freezer
To store fudge for even longer, wrap each piece in plastic wrap and place it in a freezer-safe bag or container. It will keep well for up to 3 months. Thaw in the refrigerator or at room temperature before enjoying.
Always ensure your fudge is stored in a tightly sealed container to maintain its freshness and prevent it from drying out!
Let’s Keep the Holiday Magic Going!
I hope you and your family enjoy this rich and creamy homemade fudge recipe as much as we do—it’s truly a holiday classic!
If you’re not making it today, don’t forget to pin this recipe for later so you can easily find it when you’re ready to whip up a batch.

Looking for another festive treat? Be sure to check out my Peppermint Bark recipe from Day 2—it’s the perfect combination of chocolate and peppermint with a satisfying candy cane crunch.

For even more holiday inspiration, be sure to follow me on Instagram, Facebook, Pinterest, and YouTube.
I’d love to see your homemade fudge creations—tag me so I can share them! Let’s keep spreading the holiday cheer together!
Happy Baking! – Tandra Nicole